DELIVERY just £9.95
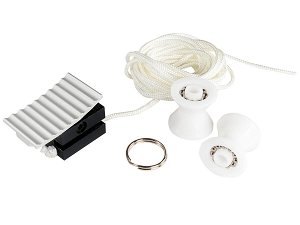
KEESE01-020 Excalibur 5000 Head Service Kit


KEESE01-020 Excalibur 5000 Head Service Kit
Complete set of sliding bearing blocks with all fixing screws and a multi-cutter return spring
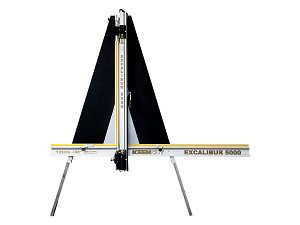
Suitable for Excalibur 5000 only.
How to replace the set of sliding bearing blocks on the Excalibur 5000:
Tools required:
Allen (hex) key 2mm
Thin long screwdriver or unfolded paperclip
What to do:
Remove the sliding bearing blocks in each cutting head in turn the process is the same for both.
Ensure the balance weight is attached to the cutting head you are not servicing (see instruction manual if required).
Close the clamp and remove the Twin Wheel (HB) cutter plate.
Remove white plastic thumbscrew and all eight sliding bearing fixing/adjustment screws using a 2mm Allen (hex) key from the near right hand side of the carriage.
Whilst holding the cutting head, push out the two bearing blocks from one end using a long thin screwdriver, unfolded paperclip or similar object.
Move the carriage away and to the left to remove the whole cutting head.
Take to a bench and remove the four fixing screws for the rear bearing blocks and replace with new, take care not to overtighten screws and to get the orientation of the bearing blocks correct.
Replace the cutting head onto the machine, insert the new white plastic knob and fasten to hold cutting head in place.
Slide in the two near bearing blocks and fix with screws, the white plastic screw may need to be loosened a little when pushing the bearings in, ensure the cutting head is firmly held whilst doing so.
Tighten the four adjusting screws (outer screws in each set of four) to lock the carriage in place and bed screws into blocks.
Release the white plastic thumbscrew, hold onto the cutting head handle and undo each adjustment screw two full turns to loosen the cutting head and allow it to slide down.
Hold the cutter at waist height and place the 2mm Allen (hex) key on the top adjustment screw.
Move the cutting head up and down and tighten the screw very gradually until the cutting head does not fall under its own weight.
Loosen the screw by the smallest amount you can until it does fall under its own weight.
Repeat the process with the other three adjustment screws.
Follow the same procedure with the other cutting head.
Also in the Range View Range
Questions
Please feel free to ask any questions about this product.


